CI/CD (Continuous Integration and Continuous Deployment) is a pratice helps us to deliver applications to customers quickly and safely. In this article, I will show you how to deploy a application to Azure App Service by Azure DevOps. My process will be: Push code to Github -> Create Run pipeline -> Create release with latest code. Fist of all, we need to comprehend the fundamental concepts.
What is Pipeline?
A pipeline is a set of instructions that can be executed on various agents. It is a collection of jobs that can be executed sequentially or in parallel.
What is Jobs?
A job is a set of steps that execute on the same target. Each job runs on an agent.
What is Agent?
An agent is a software that is installed on the machines. It is responsible for managing the execution of jobs . The agent is capable of handling one or more jobs depending on the configuration.
What is Agent Pool?
An agent pool is a collection of one or more agents. These agents can be Microsoft-hosted agents or self-hosted agents. If your account is free tier, I advice you use self-hosted agents follow by this tutorial.
What is Artifact?
Artifact is the result or output produced by a build pipeline or a release pipeline, and it can include compiled binaries, executables, libraries, configuration files and so on. User cases:
- Continuous Integration (CI): Build artifacts are often used in CI pipelines to produce and store the compiled output of the application.
- Continuous Deployment (CD): Release artifacts are used in CD pipelines to deploy applications to various environments.
What is Stage?
A stage is a logical boundary in a pipeline. Each stage can be configured to run sequentially or in parallel. I usually use stage to separate application to different environments such as Dev, Staging, Production. In stage, we can define jobs to execute like build, test, deploy.
What is Release?
A release pipeline is a pipeline that deploys the artifacts to a target environment. In release pipelines, you can configure the stages and tasks that are required to deploy your application.
Now, let's create a pipeline to deploy our application to App Service by Azure DevOps.
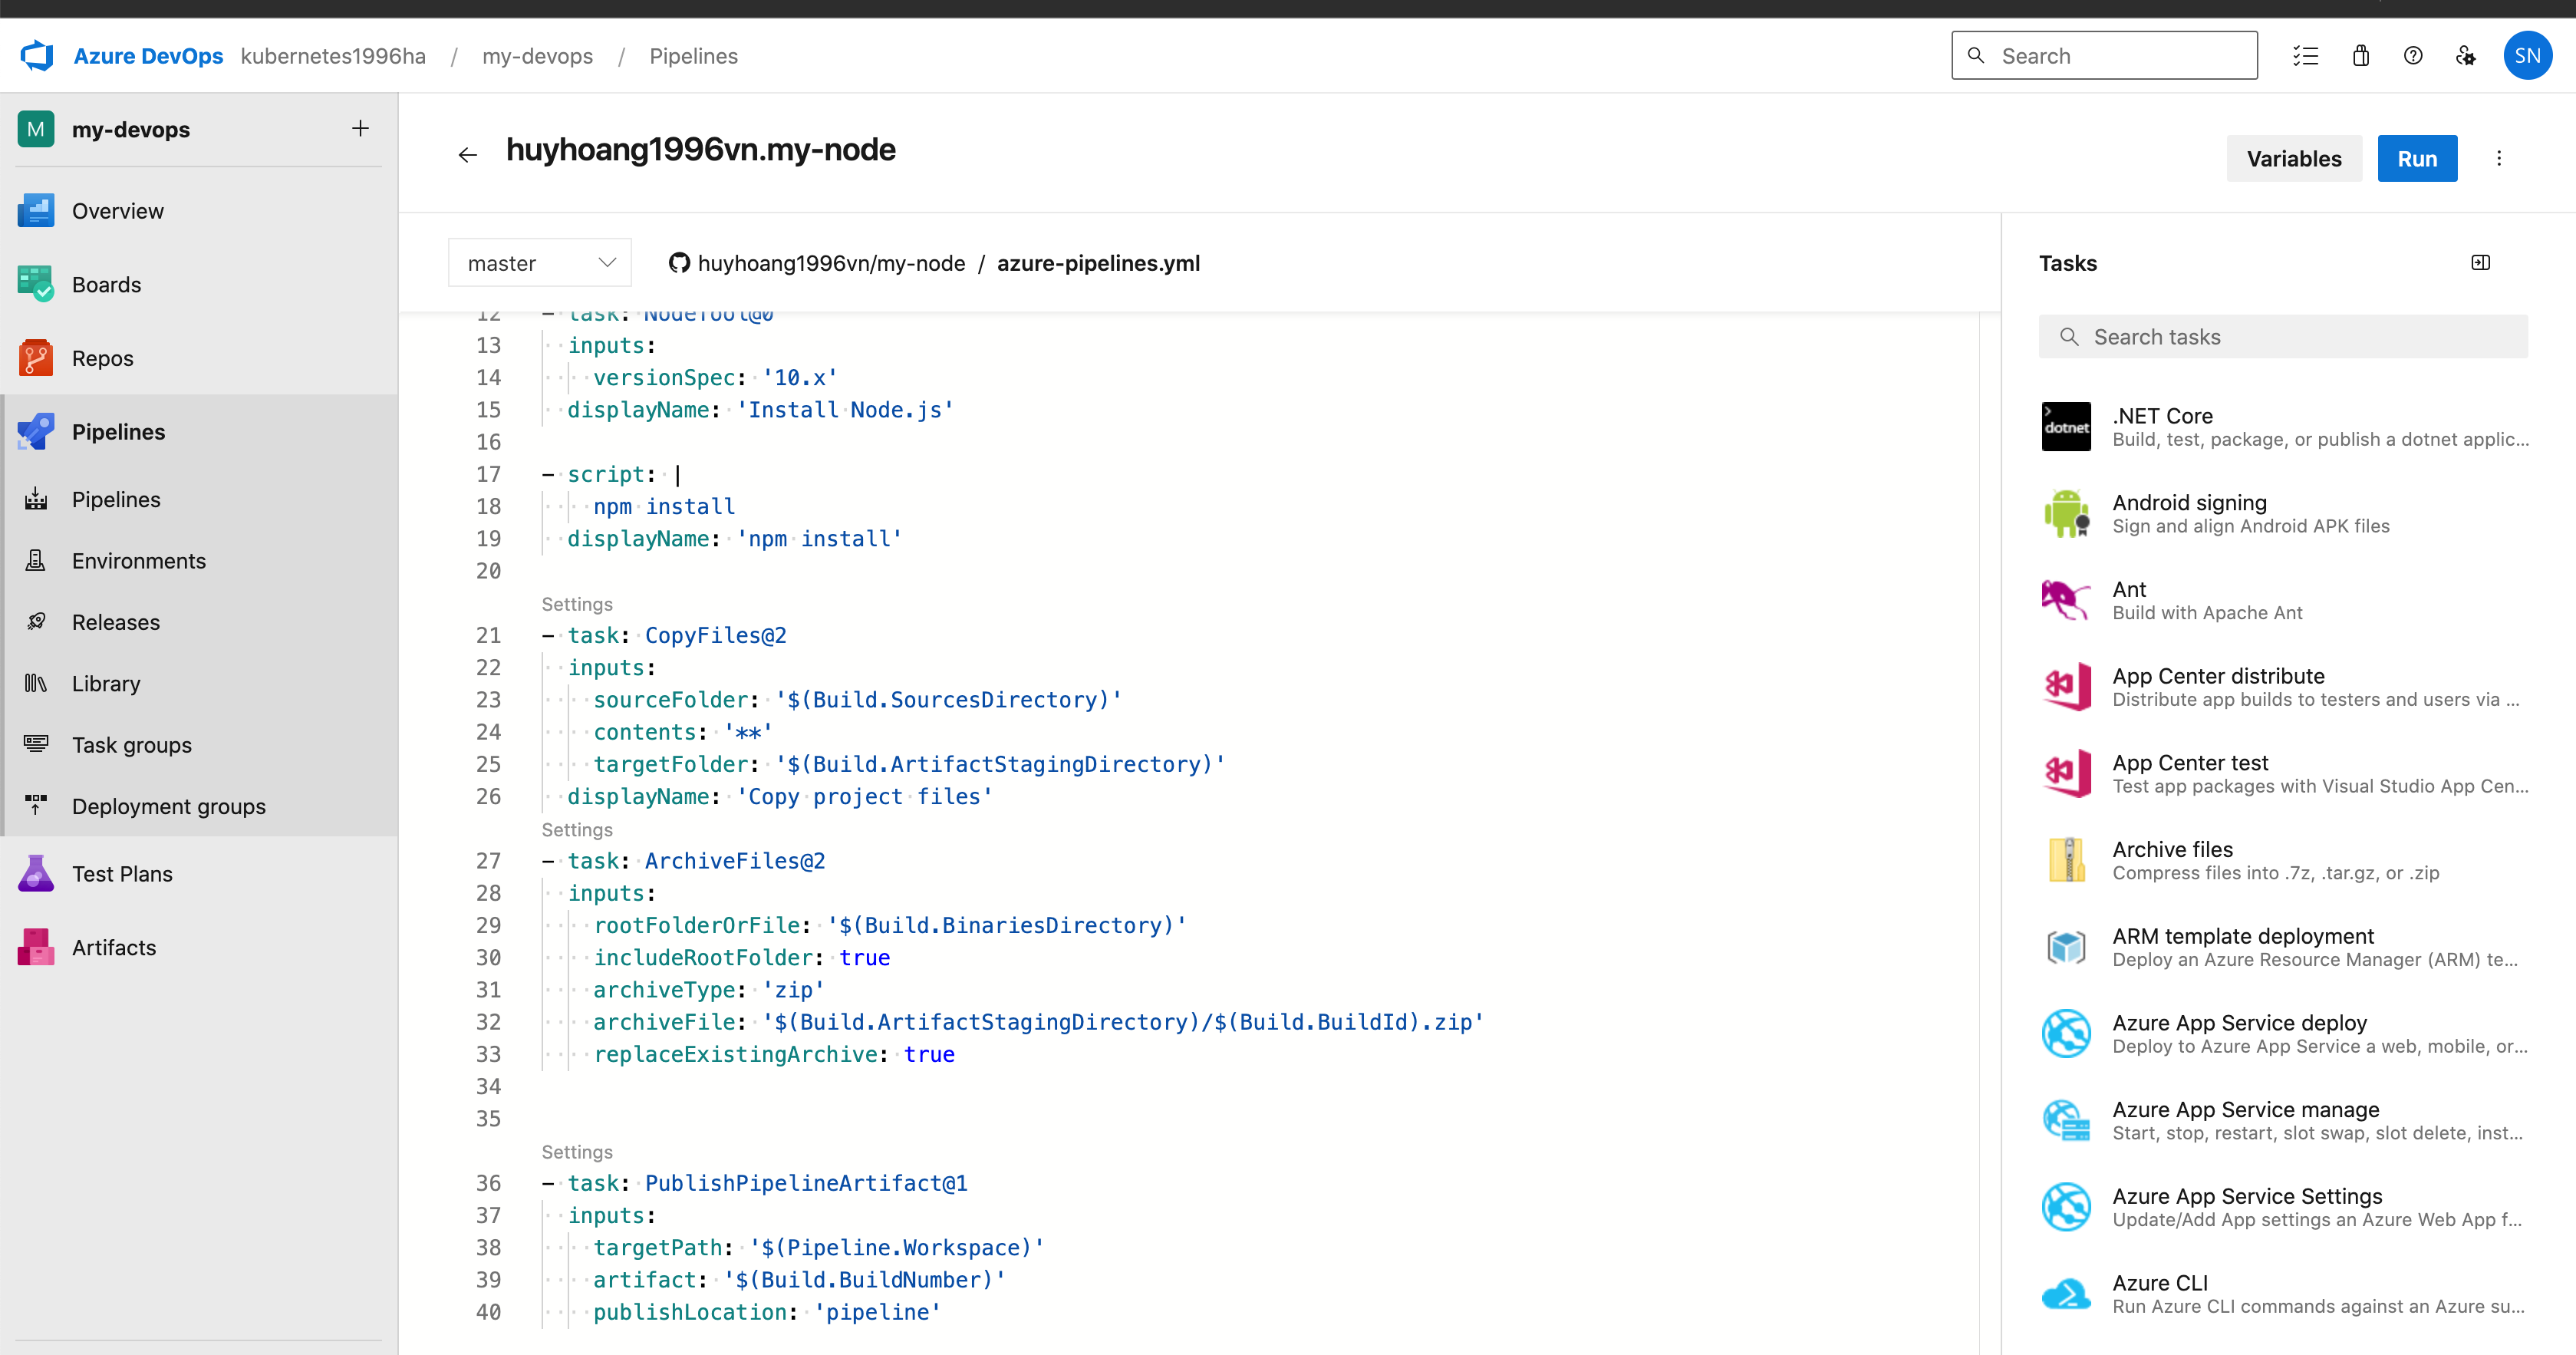
The process of creating a pipeline is: Copy file -> Archive file -> Publish Artifact. Then, we click on the button "Run" to run the pipeline. Jobs will be executed on the agent.
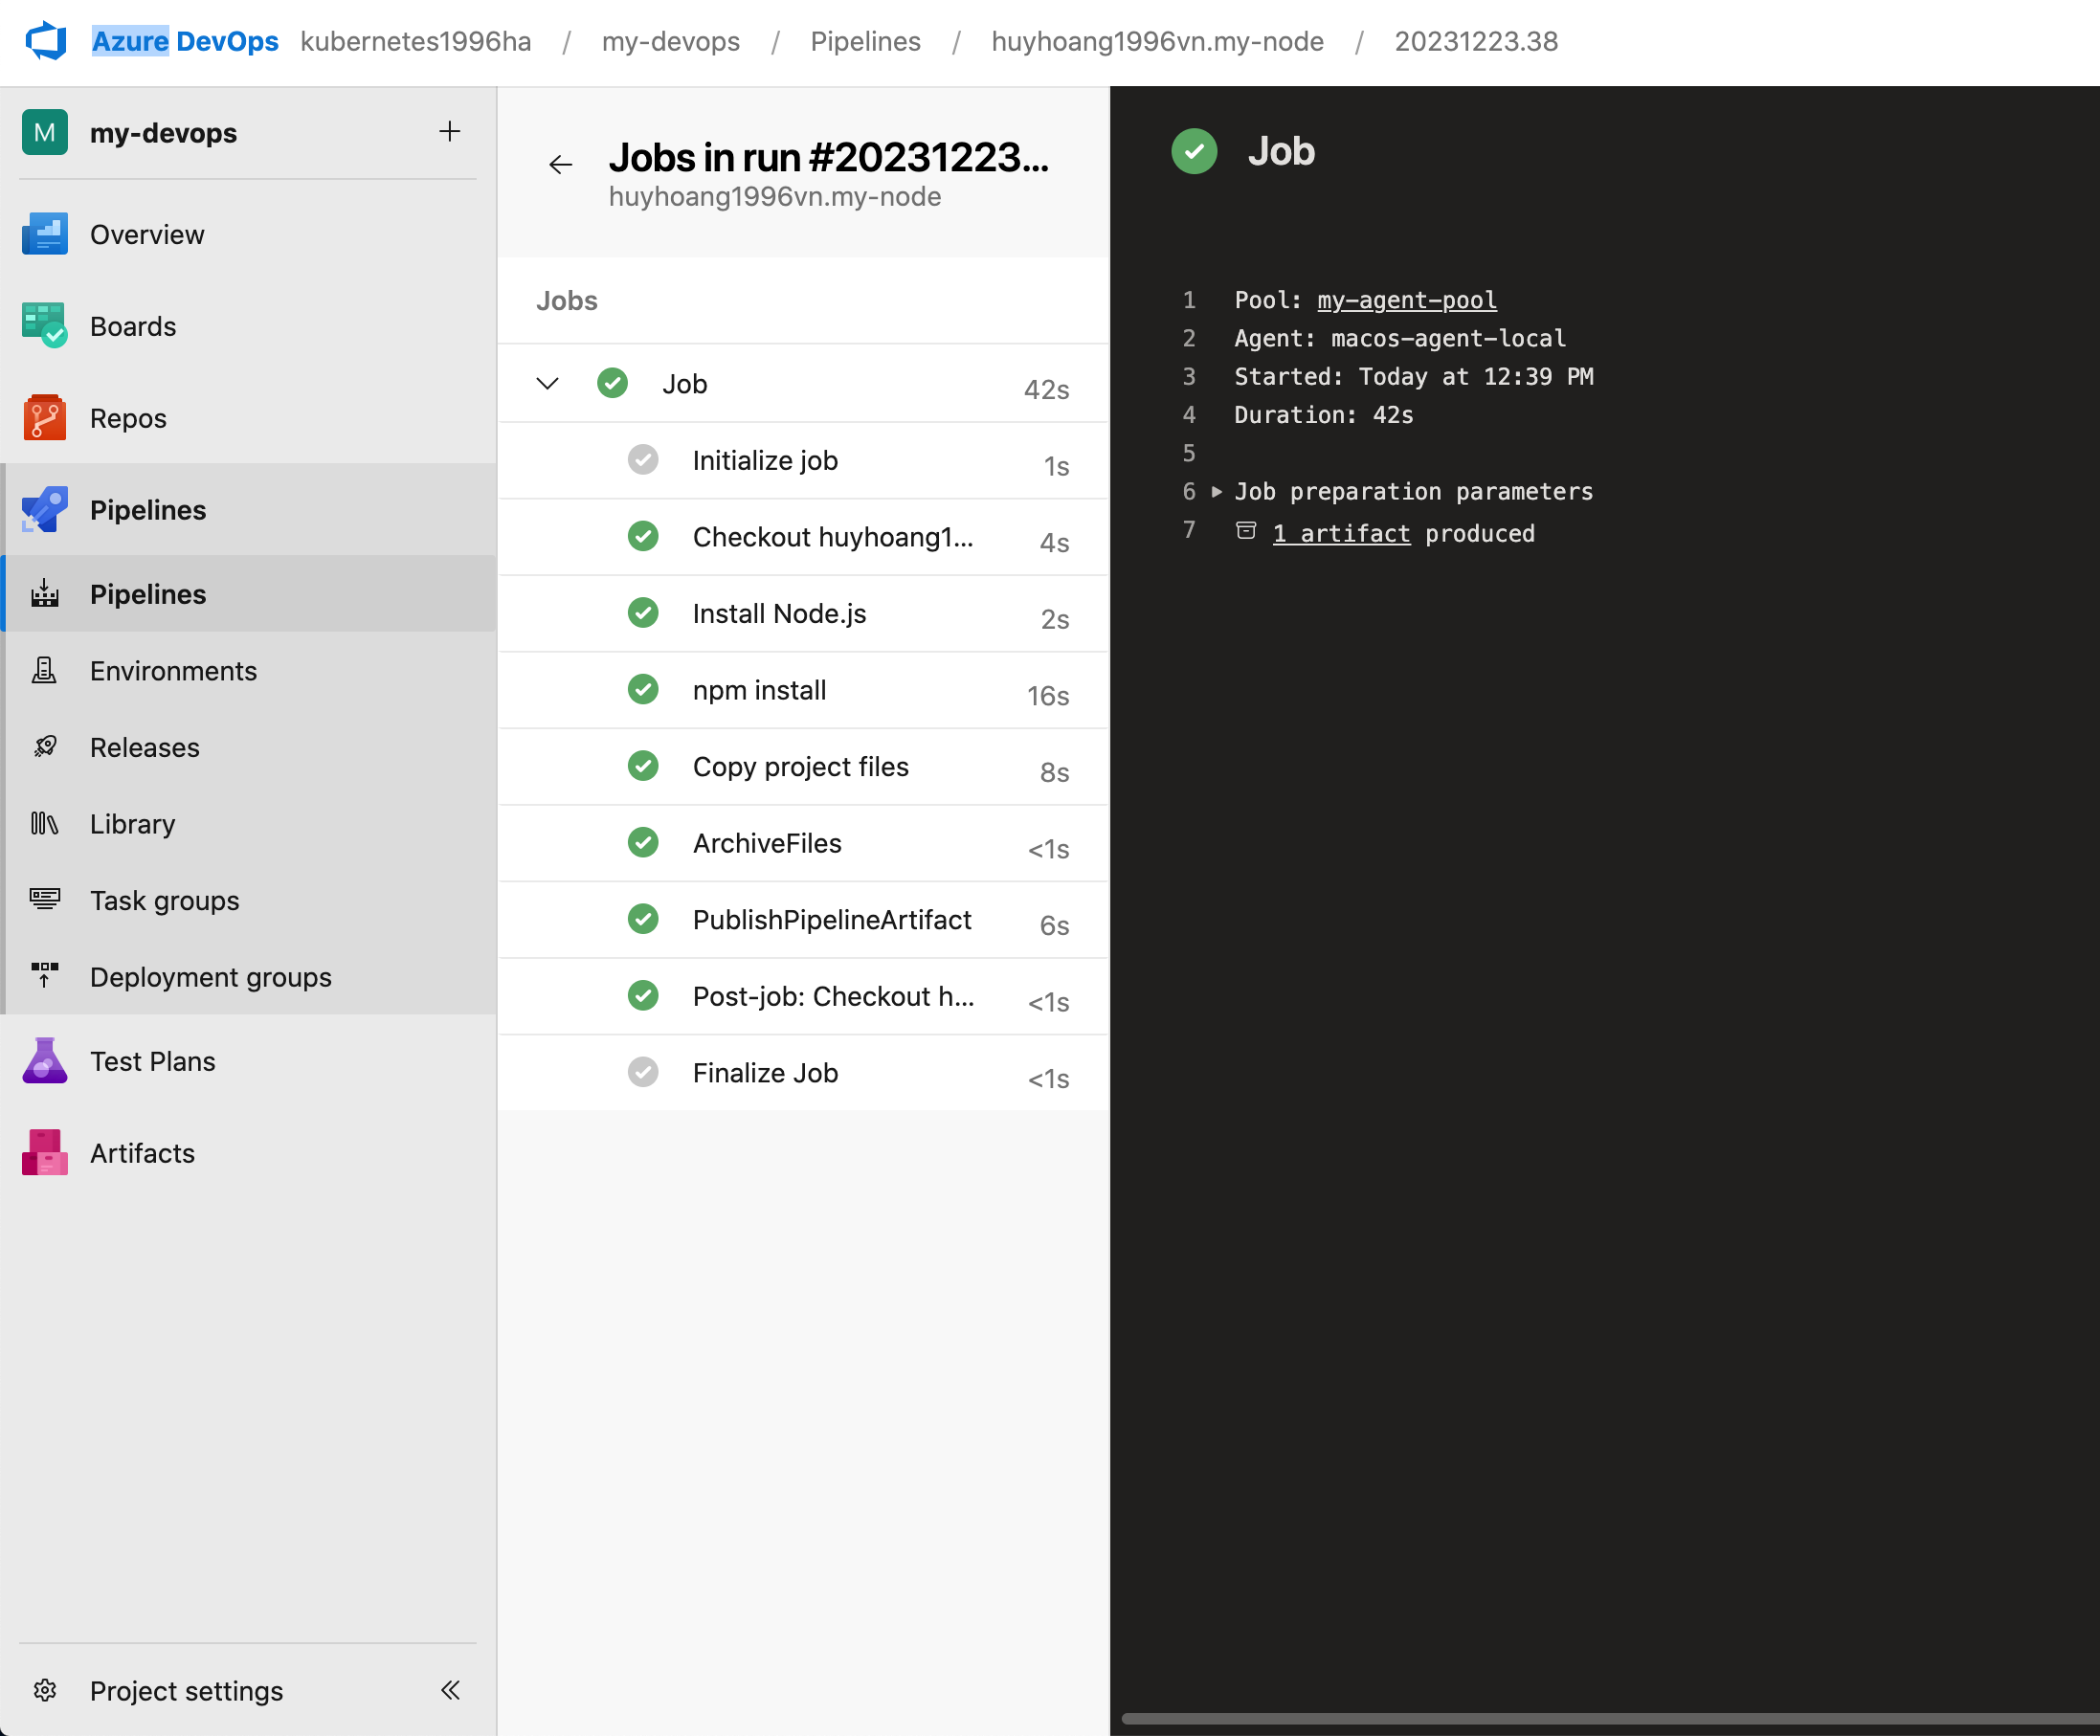
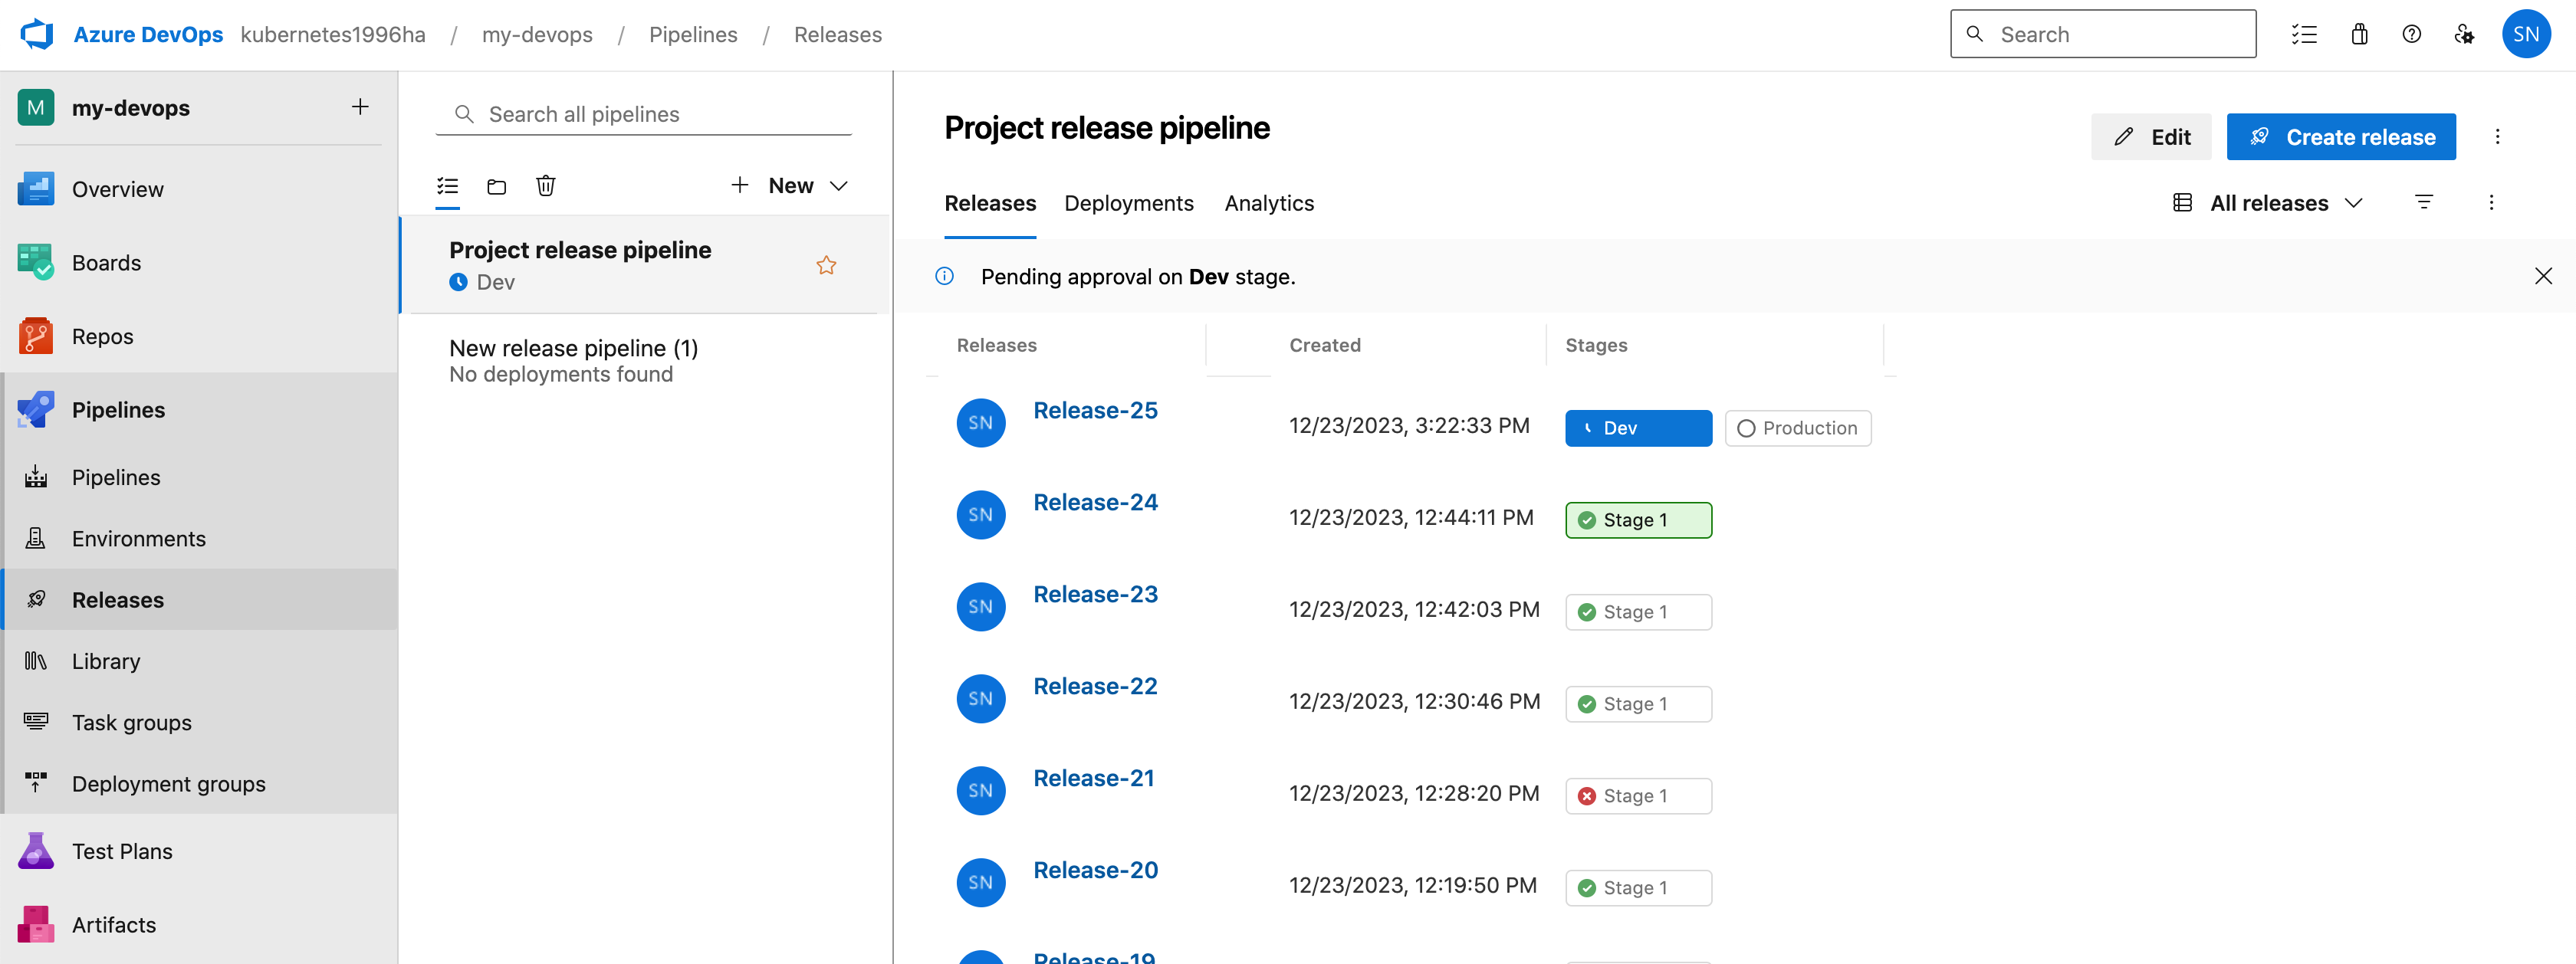
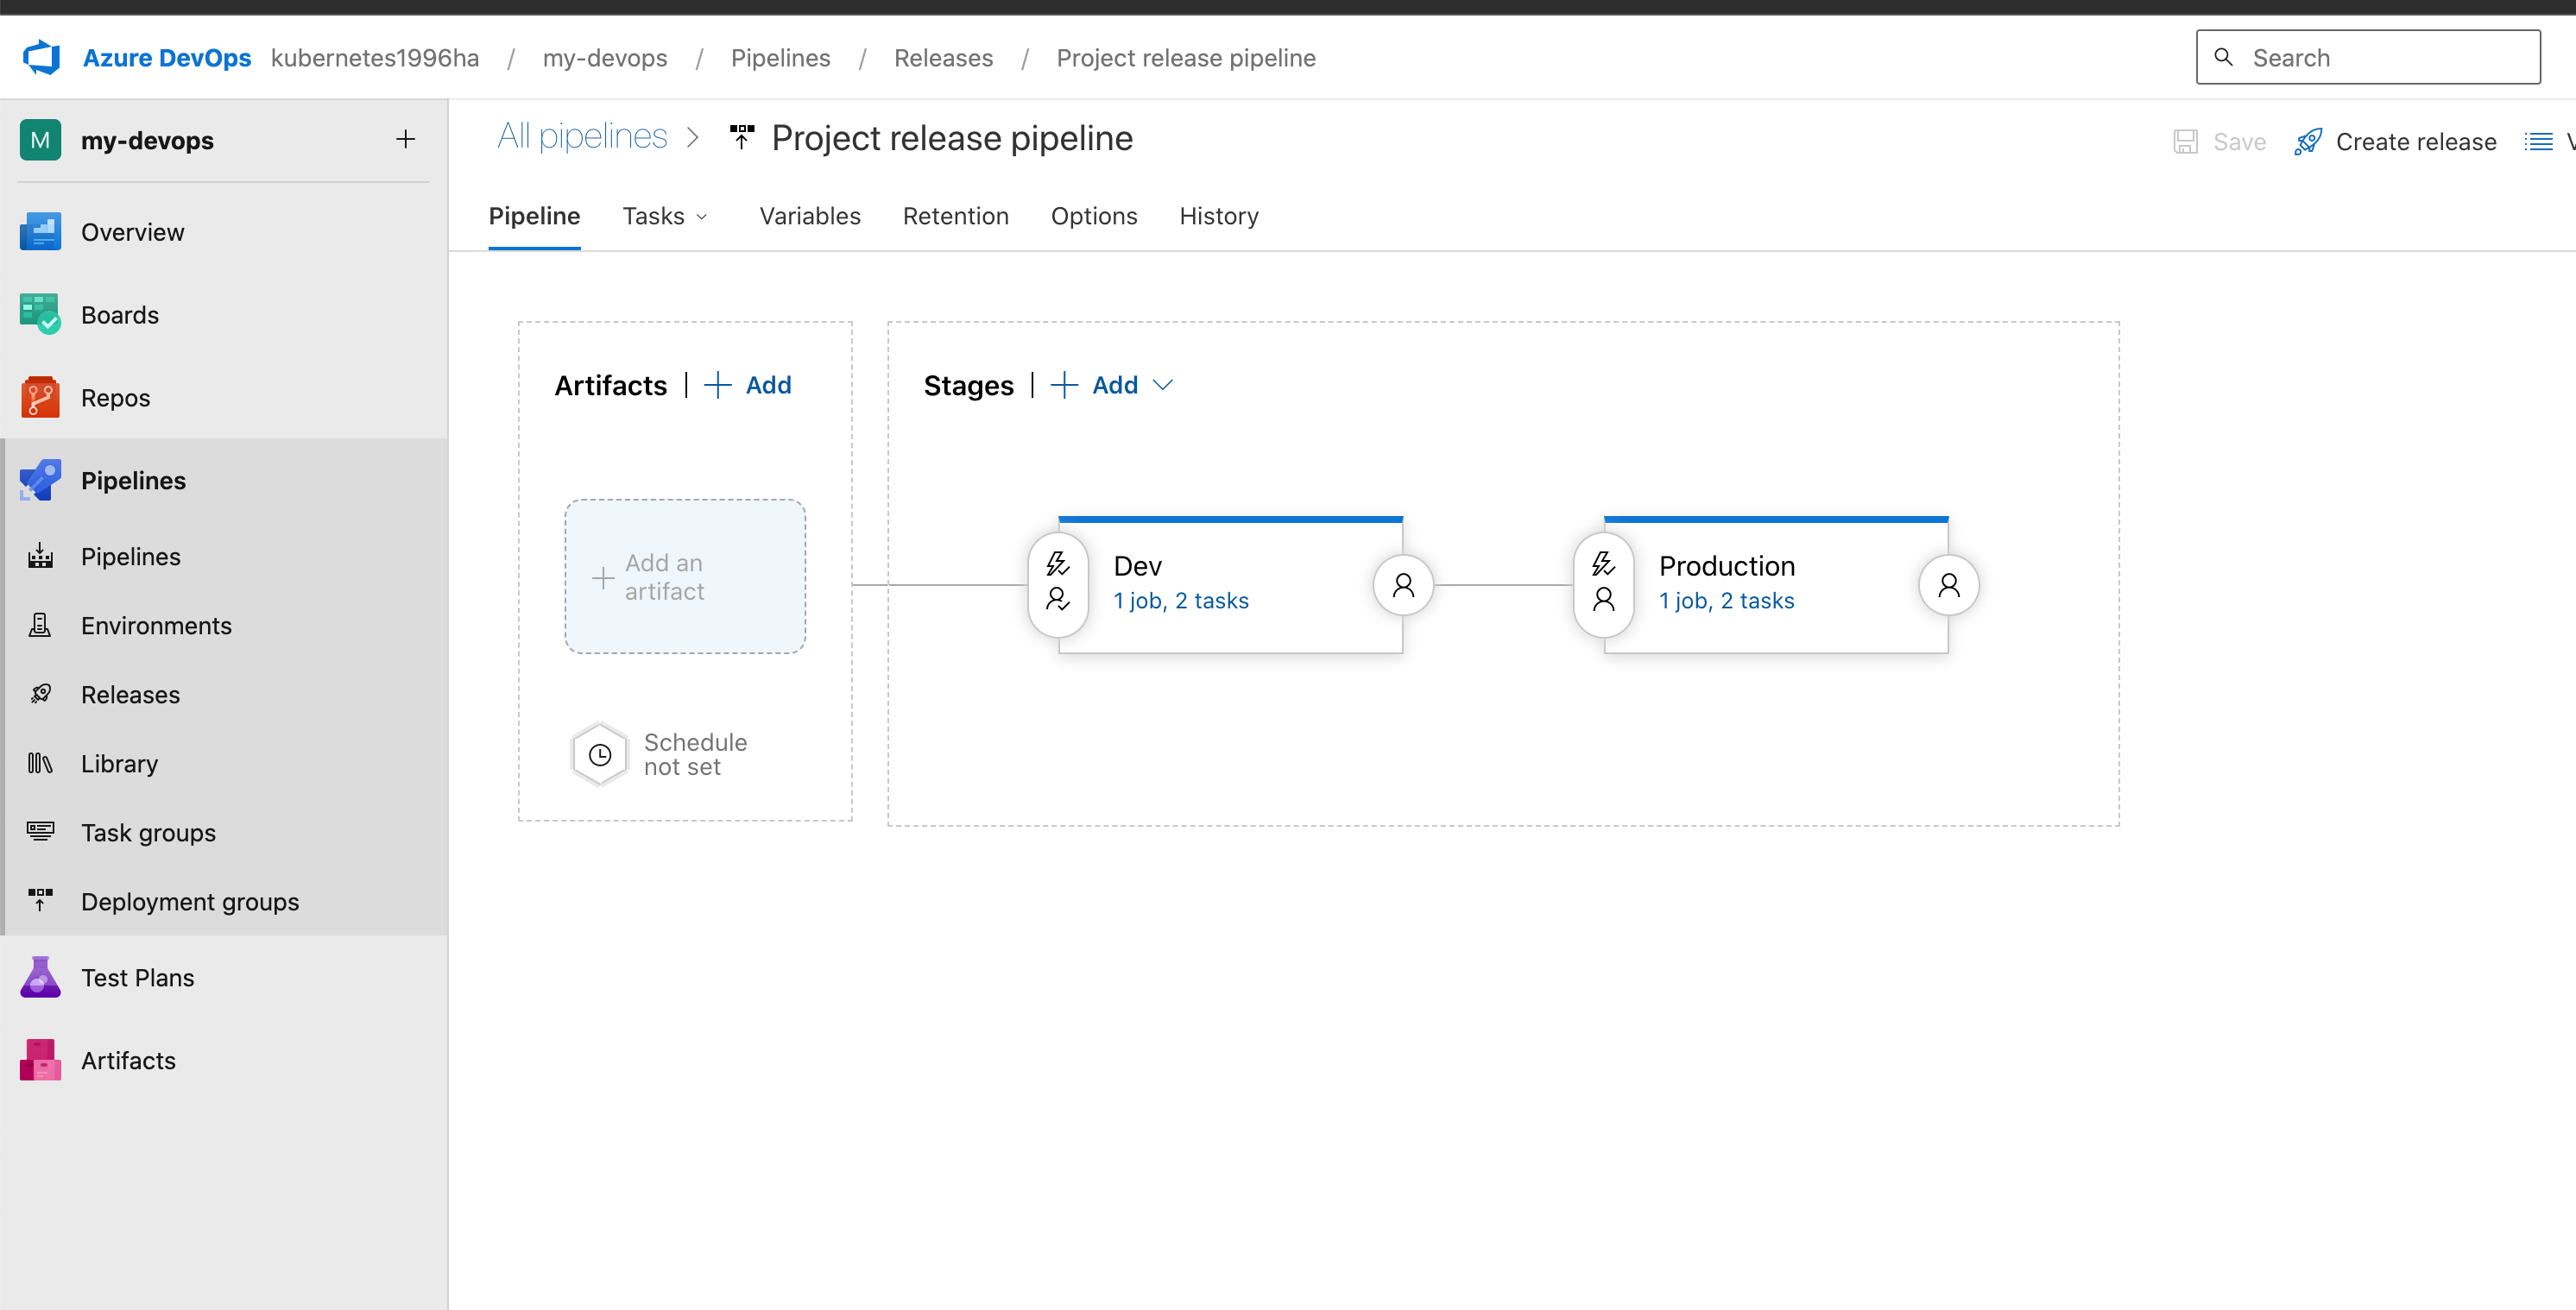
Once jobs are completed, we can see the result of the pipeline. Come to "Release" section, we define behaviors of release. In this case, we have 2 stages: Deploy to Dev and Deploy to Prod. Each stage has 2 job: Download Artifact and Deploy to App Service.
To kick off the release, we click on the button "Create release" and select the latest build. We can inspect process of release. In my case, Stage 1 already deployed, Dev is pending to approval deployment and Production will be enabled once Dev completed.